内容が古くなっている可能性がありますのでご注意下さい。
ScrapyはWebサイトのクローリングとスクレイピングのための、Pythonで実装されたフレームワークです。スクレイピングはWebページから情報を抽出する技術であり、クローリングはWebページのリンクを辿りながら情報を取得する技術です。
Scrapyを使用して、指定したサイト内の画像ファイルとその画像が貼られたページのURLリストをMySQLのデータベースに格納するWebクローラーを開発します。
ScrapyはPIPコマンドでインストールします。
> pip install Scrapy
Anacondaにはcondaコマンドでインストールすることができます。
> conda install -c conda-forge scrapy
インストールすると、scrapyコマンドが使用可能になります。
> scrapy version
Scrapy 2.2.0
はじめに、プロジェクトを作成します。ここでは、プロジェクトの名前は mycrawler とします。
> scrapy startproject mycrawler
以下のようなディレクトリとファイルが作成されます。
mycrawler <DIR>
    scrapy.cfg
    mycrawler <DIR>
        items.py
        middlewares.py
        pipelines.py
        settings.py
        spiders <DIR>
            __init__.py
            __pycache__ <DIR>
        __init__.py
        __pycache__ <DIR>
settings.py には、クローラーの動作に関する設定値が記述されています。以下のHTTPキャッシュについては、コメントを外して有効にした方が良いでしょう。
# Enable and configure HTTP caching (disabled by default)
# See https://docs.scrapy.org/en/latest/topics/downloader-middleware.html#httpcache-middleware-settings
#HTTPCACHE_ENABLED = True
#HTTPCACHE_EXPIRATION_SECS = 0
#HTTPCACHE_DIR = 'httpcache'
#HTTPCACHE_IGNORE_HTTP_CODES = []
#HTTPCACHE_STORAGE = 'scrapy.extensions.httpcache.FilesystemCacheStorage'
次に、mycrawlerディレクトリに移動し、クローラーのテンプレートを生成します。
> scrapy genspider -t crawl moon moon.midoriit.com
-t オプションでクローラーの種類を選択します。リンクを辿って情報を取得する場合は crawl を指定します。クローラーの名前とクロールするドメインも指定します。ここでは、クローラーの名前は moon、ドメインは月待ビンゴプロジェクトの moon.midoriit.com を指定しています。
spidersディレクトリ下に moon.py が作成されます。
import scrapy
from scrapy.linkextractors import LinkExtractor
from scrapy.spiders import CrawlSpider, Rule


class MoonSpider(CrawlSpider):
    name = 'moon'
    allowed_domains = ['moon.midoriit.com']
    start_urls = ['http://moon.midoriit.com/']

    rules = (
        Rule(LinkExtractor(allow=r'Items/'), callback='parse_item', follow=True),
    )

    def parse_item(self, response):
        item = {}
        #item['domain_id'] = response.xpath('//input[@id="sid"]/@value').get()
        #item['name'] = response.xpath('//div[@id="name"]').get()
        #item['description'] = response.xpath('//div[@id="description"]').get()
        return item
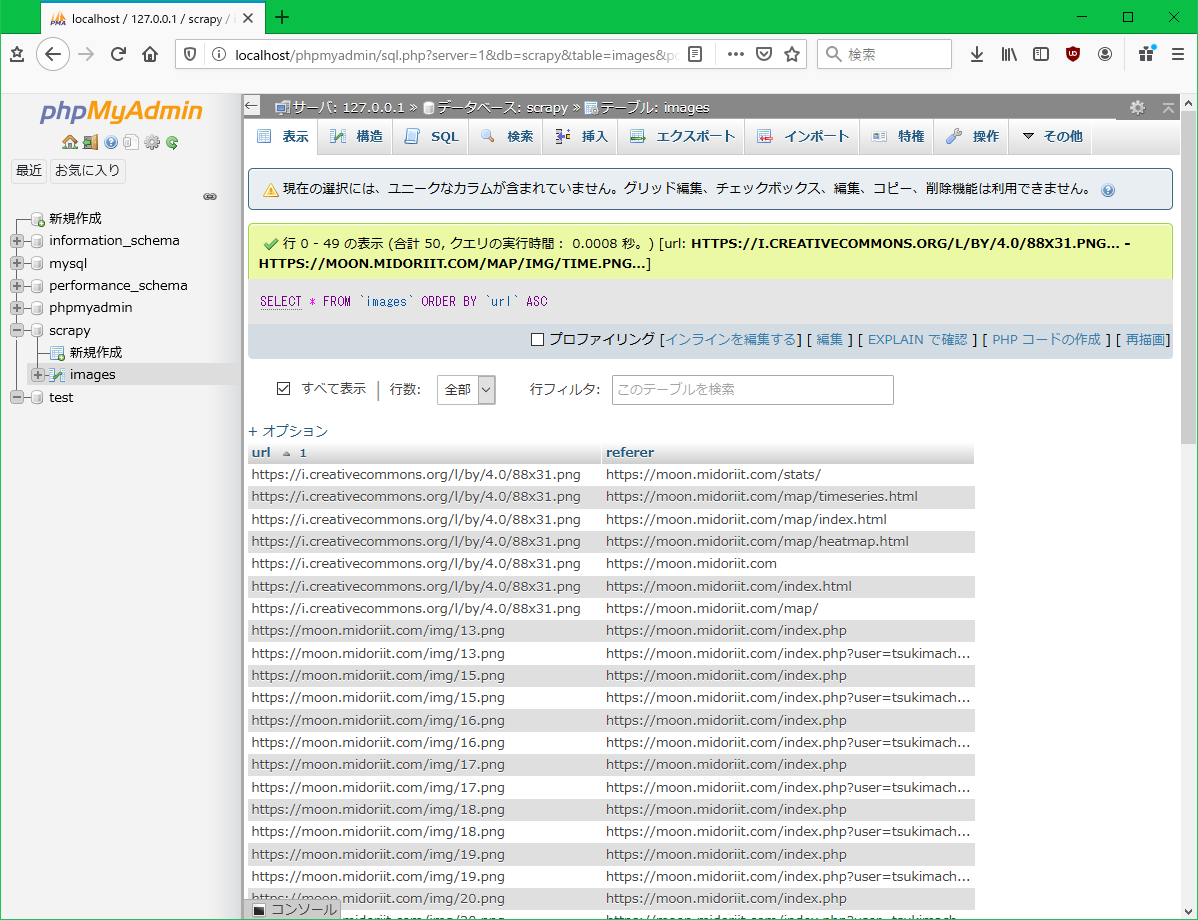
ここで、クローラーが収集した情報を格納するテーブルをMySQLのデータベースに作成しておきます。テーブル名は images、カラムは url と referer を可変長文字列で作成します。
自動生成された moon.py を以下のように変更します。
import scrapy
from scrapy.linkextractors import LinkExtractor
from scrapy.spiders import CrawlSpider, Rule
import MySQLdb

class MoonSpider(CrawlSpider):
    name = 'moon'
    allowed_domains = ['moon.midoriit.com']
    start_urls = ['https://moon.midoriit.com/']

    rules = (
        Rule(LinkExtractor(), callback='parse_item', follow=True),
    )

    def parse_item(self, response):
        conn = MySQLdb.connect(user='scrapy', passwd='scrapy', host='localhost', db='scrapy')
        sql = 'INSERT INTO images VALUES (%s, %s)'

        c = conn.cursor()
        for img in response.xpath('//img/@src').getall():
            try:
                c.execute(sql, (response.urljoin(img), response.url))
            except MySQLdb.Error as e:
                print('MySQLdb.Error: ', e)
        c.close()
        conn.commit()
MySQLと接続するために、mysqlclientのインポートを追加します。
import MySQLdb
mysqlclientがインストールされていない場合は、
pip install mysqlclient
でインストールします。
LinkExtractor()の中は空にしています。これは、フィルタリングせずにmoon.midoriit.com内のすべてのリンクを辿るためです。
parse_item()では、MySQLに接続し、response.xpath(‘//img/@src’).getall()でページ内のすべての<img>要素のsrc属性の値を取得し、response.urljoin()で相対パスを絶対パスに変換し、当該ページのURL(response.url)と共に images テーブルに挿入します。
上記ソースのSQL文で、’IINSERT’の’I’が全角になっているのは、ブログ投稿時にWAFでエラーになるのを防ぐためです。もちろん半角の’i’が正しいです。
クローラーの実行は以下のコマンドを使用します。
> scrapy crawl moon
最後の引数は、genspiderで指定したクローラーの名前です。
実行した結果、以下のように50の画像ファイルとページのURLのセットが得られました。
キャッシュを有効にした場合、mycrawler/.scrapy/httpcache ディレクトリ下にファイルが保存されますので、不要になったら削除します。